

Preparing Your Files

The color mode of your document should be set to CMYK and not RGB. CMYK, which stands for cyan, magenta, yellow, and key (black) are the inks used for all printed materials. RGB (red, green, blue) color mode is used for images on computer screens. Be aware that converting images from RGB to CMYK can cause colors to change or take on strange hues. If your project is requiring spot colors or clear coat, please contact us for more information.

If your artwork is going to print to the edge of the paper, you need to add a 0.125" (1/8") bleed (red area) on all sides. Bleeds can be set up in all Adobe CS programs. This will ensure that no white edges appear around your product. Make sure no text or important imagery is beyond the bleed area and is 0.125" (1/8") away from the document edge (blue area). This way nothing important is trimmed off during the cutting process.
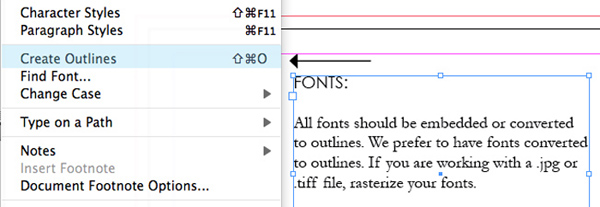
All fonts should be embedded or converted to outlines. We prefer to have fonts converted to outlines. Keep in mind that many fonts downloaded for free from the internet cannot always be embedded into your file. If you are working with a .jpg or .tiff file, rasterize your fonts.

Resolution is key to having a successfully printed job. All artwork should have a resolution of at least 300 ppi (pixels per inch within your image). This will affect the print size and quality of your image. If there are too few pixels per inch, your image may appear pixilated or fuzzy. Keep in mind that lower resolution images may look fine on your screen but will not print that way. Note that most images taken off the internet (Google images, stock photography, etc.) are only 72 ppi (screen resolution).
